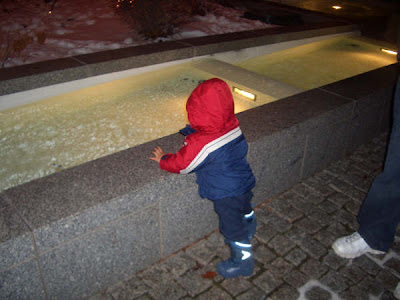
On Monday night we went to see the lights at Temple Square with Uncle Brian and Aunty Shanna. It was the perfect night to go as it wasn't teeth shattering cold, it wasn't snowing or raining and there was no slippery snow on the footpaths. We had a blast. I absolutely love the look of lights in the trees. It is peaceful somehow. I think it would be neat to have a big long driveway lined with trees lit up by lights. Maybe someday!
Even though Christmas had come and gone, there were still lots of people checking out the lights. As always, the lights were beautiful and it was just a fun night all in all. Shanna was nice enough to be our photographer. Thanks Aunty Shanna for inviting us we love you!
Gabe had lots of fun walking around and exploring. He particularly enjoyed picking up clumps of snow and throwing them in the waterfall. It was cute to hear him make his own sound effects as the snow would hit the water. Funny kid.
Family pic in front of a nativity
Mr. Independent. We have entered the toddler phase in which Gabe thinks he is big enough to do everything. He has to sweep, mop, take out the rubbish, un-stack the dishwasher, put his clothes in the dirty laundry, blow dry my hair, brush my hair, brush my teeth and the list goes on. Whilst cute, it is sometimes a pain in the butt. When we were at Temple Square, he had to push the stroller. At one point in an attempt to distract him, I took off in front of he and Brad and he walked right up to another stroller and decided to push that one. He did love it however when we let him push and he ran into things. He would laugh and laugh when he would I would say "Crash" as we ran into people and other random objects. Good times!
Family picture in front of some lit up trees. The photos really don't do it justice. They were so gorgeous!
Temple Square
Wednesday, December 31, 2008
Tuesday, December 30, 2008
A catch up blog- Crispy Chicken Wraps and Australian Sausage Rolls
With our little family being sick for a couple of weeks before Christmas I hadn't had much time to sit and blog. I have made a couple of new things recently that were yummy and I thought were worth the mention. I am so glad the sickness and Christmas is over and am looking forward to some quieter days ahead.
My favorite new lunch item to make is these Crispy Chicken Wraps. I found the recipe on My Kitchen Cafe and fell in love with them. They are really easy to make and very very tasty. Imagine warm, crispy tortillas filled with creamy cheesy chicken. If I could have these for lunch every day I would.
Crispy Chicken Wraps
adapted from Cook's Country
**To prevent the wraps from unrolling during cooking, be sure to start them seam-side down in step 3.
1/3 cup mayonnaise, light or regular
1/4 cup chopped fresh cilantro
3 scallions, sliced very thin
2 celery ribs, chopped fine (I omitted these due to my husband's non-celery preference)
2 tablespoons sour cream, light or regular
2 teaspoons hot sauce (this does not make them spicy but adds great flavor!)
1 rotisserie chicken, skin discarded, meat shredded into bite-sized pieces (about 3 cups)
2 cups shredded cheddar cheese (the sharper the better, in my book)
4 (12-inch) flour tortillas
1. Whisk the mayonnaise, cilantro, scallions, celery, sour cream and hot sauce in a large bowl. Add chicken and toss to combine.
2. Sprinkle cheese over tortillas, leaving 1/2-inch border around edges, then arrange chicken mixture down the center of each tortilla. Roll stuffed tortillas, leaving edges open. Spray the tortillas all over with cooking spray.
3. Heat a large non-stick skillet (or griddle) over medium heat for 1 minute. I melt a little butter in the skillet just for a little added color and flavor. Arrange 2 wraps, seam-side down, in pan and cook until golden brown and crisp, about 2-3 minutes per side. Transfer to a plate and repeat with remaining wraps. Serve warm.
Australian Sausage Rolls
These are one of my all time favorite Aussie snacks not only to eat but also to make. Super easy and very tasty these never last long once they hit the plate. There are quite a few recipe variations out there but this is one I came up with a few years back when I still lived in Oz. My family always loved it when I made these and I am always delighted when my brothers request that I make them for them now. I have made them a few of times since I have lived in the States for work and family parties and they never disappoint. This picture is not of my sausage rolls. I just discovered that I don't have my USB cord to upload my pics so this one will give you an idea until I post a picture of the ones I recently made.
Australian Sausage Rolls
2 packages of Jimmy Dean Mild sausage (You could use whatever Brad you wanted)
1 Medium sized onion (**see note**)
5 tbls spoons of your favorite dried herb mix (I just eyeball it and quit when I think it is well seasoned)
Salt and pepper to taste
1 pkg. (2 sheets) Pepperidge Farms puff pastry sheets
Butter (for brushing sausage rolls prior to baking)
Mix together in a bowl; sausage meat, minced onion, dried herbs, salt and pepper. Set aside.
Roll out pastry sheets as directed on box. Cut each sheet into 4 long vertical strips and then cut those 4 strips horizontally so that you have strips of pastry that are approximately 5 inches long and 2 inches wide. Using a little more than a tablespoon of meat mixture, place meat in center of piece of pastry. Fold each side in toward the center and place seam down on a greased cookie sheet.
Brush sausage rolls with melted with butter. Bake at 350 degrees for 35 minutes or until golden brown. Sausage rolls can be eaten cold or reheated at 325 degrees for about 10-15 minutes. Many Aussies like to eat these hot with a little tomato sauce or Ketchup. I however like these best at room temperature and like them all on their own.
**Note**- Though my husband and I like the taste of onion, neither of us is a big fan of big chunks of onion in anything so when I make my sausage rolls I mince the onion in my food processor. This is purely our preference.
I promised to post some pics of my own sausage rolls when I got around to uploading them from my camera. See below.
Labels:
Australian Foods,
Chicken,
Lunch,
Main Dish,
Sausage
Monday, December 29, 2008
My cute new apron
A few months ago, I was at the mall and I saw a little stall that had the cutest retro style aprons. They had a few different designs to choose from and I immediately fell in love with them all! I was so excited when I got this one for Christmas. I get even more excited now when it is time to cook and bake. Brad took this picture yesterday when I was getting ready to make my Pumpkin Chocolate Chip Squares. I left it on the entire afternoon and Brad even asked me if I was going to wear it to our family party we had last night. I didn't want to take it off (I know, I'm lame) Now if only I could get my tile installed, I don't think I'd EVER want to leave my kitchen. I am excited to go home after work and put it on when it is time to make dinner.
Please excuse the bad pic. Too many late nights lately. I'm looking and feeling haggard!
Pumpkin Chocolate Chip Squares
I made these yesterday for a family Christmas Party. Everyone loved them. They are very easy to make and are OH SO moist and yummy. A definite crowd pleaser! They are the type of slice you need to take somewhere after making it, otherwise you can easily end up eating them all yourself. My all time favorite cookie is my sister in law Elizabeth's pumpkin chocolate chip cookies. I have tried making pumpkin chocolate chip cookies twice and both times they weren't as moist as I wanted them to be so I was thrilled when I found this recipe on the Martha Stewart website. There is just something about the combination of chocolate and pumpkin that is heavenly. ENJOY!
Ingredients:
• 2 cups all-purpose flour (spooned and leveled)
• 1 tablespoon pumpkin-pie spice
• 1 teaspoon baking soda
• 3/4 teaspoon salt
• 1 cup (2 sticks) unsalted butter, room temperature
• 1 1/4 cups sugar
• 1 large egg
• 2 teaspoons vanilla extract
• 1 cup canned pumpkin puree
• 1 package (12 ounces) semisweet chocolate chips
• Preheat oven to 350 degrees. Line bottom and sides of a 9-by-13-inch baking pan with foil, leaving an overhang on all sides. (I don’t do this. I just grease the pan with cake release or non-stick spray. It works fine)
• In a medium bowl, whisk together flour, pie spice, baking soda, and salt; set aside.
• With an electric mixer, cream butter and sugar on medium-high speed until smooth; beat in egg and vanilla until combined. Beat in pumpkin puree (mixture may appear curdled). Reduce speed to low, and mix in dry ingredients until just combined. Fold in chocolate chips.
• Spread batter evenly in prepared pan. Bake until edges begin to pull away from sides of pan and a toothpick inserted in center comes out with just a few moist crumbs attached, 35 to 40 minutes. Cool completely in pan.
Wednesday, December 24, 2008
Delicate Pear Cake with Caramel Sauce
I have been meaning to post this recipe since Thanksgiving, but just haven't had the time to sit down and do it. A friend of mine (Mimi Sue) made this cake for a church thing we had just prior to Thanksgiving and I instantly fell in love with it. I am not a lover of pears AT ALL but this cake is SOOOOO good. It was easy to make and the final product just looked pretty. I love food that looks pretty when it is all done. The cake is moist and delicious, but what truly seems to make the cake (I think and my mother-in-law agreed) is the caramel sauce. I made two of these to take to a family Thanksgiving dinner and those who tried it seemed to really like it.
CAKE
1 (16-ounce) can pear halves in light syrup
1 package (1-lb 2.25-oz) pudding-included white cake mix (just the mix)
1/3 cup oil
3 egg whites
FROSTING
1 cup whipped cream
2 tablespoons sugar
1 teaspoon vanilla
1 (16-ounce) can pear halves in light syrup drained and cut however you like for garnishing purposes only.
1/2 cup finely chopped hazelnuts or walnuts, toasted (also for garnish)
SAUCE
1 cup firmly packed light brown sugar
1 cup whipping cream
1/2 cup butter or margarine
Heat oven to 350°F. Grease and flour 10-inch tube pan. Drain pear halves, reserving 1/3 cup liquid. Place pear halves in food processor bowl with metal blade or blender container; process until smooth.
In large bowl, combine cake mix, pureed pears, reserved 1/3 cup pear liquid, oil and egg whites at low speed until moistened; beat 2 minutes at high speed. Pour into greased and floured pan.
Bake at 350°F. for 40 to 45 minutes or until toothpick inserted in center comes out clean. Cool upright in pan 15 minutes; invert onto serving plate. Cool completely.
In small bowl, beat 1 cup whipping cream and sugar until stiff peaks form. Fold in vanilla. Frost cooled cake with whipped cream. Cut drained pear halves lengthwise into about 32 slices. Arrange on top of cake, slightly overlapping slices. Press nuts into sides of cake. Refrigerate until serving time.
In medium saucepan, combine all sauce ingredients; mix well. Bring to a boil. Boil over medium heat 5 minutes, stirring occasionally. Remove from heat. Cool to room temperature.
To serve, spoon about 2 tablespoons sauce onto individual dessert plates. Place slice of cake on sauce. Store cake and sauce in refrigerator.
Note- Even though I am not a lover of pears, the garnish of pears on top of the cake really made the cake refreshing. That being said, I wouldn't skimp on the pears as the garnish even if you’re not a fan of pears. The natural but not over-powering sweetness of the pears is the perfect compliment to the caramel sauce. Also, when I made my caramel sauce, the store had been cleaned out of light brown sugar and so I had to use dark brown. Though it worked ok, I wouldn't recommend the dark as the molasses flavor was a little too strong.
Sunday, December 21, 2008
WHAT a couple of weeks we've had! Primal scream anyone?
These past couple of weeks have really been something else for our little family. After talking to friends and family, it seems like every man and his dog either have or have had the stomach flu lately and we were NO exception. After a weekend family event (isn't that always how it happens?)Gabe was the first one hit. Though I'm thinking now...two weeks later that what Gabe probably had was Rotavirus it has been the PITS. I tell you what, you know your a mum when your child vomits (not just once) on you and then you find yourself changing and or cleaning up nasty messy nappies every couple of minutes for a couple of weeks. Then it was my turn! UGH!. Thankfully my version of events was much less dramatic but no fun nonetheless. I don't know that there is ever a good time to get the stomach flu, but it sure did feel like this was a particularly bad time. Gabe and I got sick right as Brad was in his final week of the semester with mountains of homework and big assignments due. Then came finals week. Long story short we have been house bound for a couple of weeks now and Christmas Day is fast approaching. I haven't been grocery shopping (now a week over due) so have little left in the cupboards and am in desperate need to hit the mall to do ALL my Christmas shopping. This past week as the cupboards were becoming VERY bare, I think we hit every fast food chain in Kaysville. Thankfully one day last week some sweet friends brought us dinner. Thanks to the Olsen's!
Pardon me while I engage in a primal scream!!!!!!! This too shall pass. EVENTUALLY. I just hope it is soon. Tis the sicky season! I keep telling myself that if I were home right now in good ol Australia we would not be around sick people, or snow. Gotta stop doing that! LOL.
Tuesday, December 9, 2008
I love the smell of a real Christmas Tree
On Monday night after dinner we got all bundled up, jumped in Daddy's big red truck and went over to the nursery to pick out our Christmas tree. Growing up we only ever had a real tree and the smell brings back many fond memories so I just can't bring myself to cross over to the dark side and buy a fake one. There is just something about the look and smell of the real tree that makes it really feel like Christmas to me.
It was a cold, wet and somewhat snowy night but we had a blast. In past years Brad and I have always gone to a place in Layton which is basically a parking lot that has a bunch of trees in it for sale and some questionable looking guys selling them. This year however, we decided to go to a nursery in West Kaysville and I am so glad that we did. Once we had picked out the tree, we went inside the cute decorated store and enjoyed hot chocolate, cookies, listening to a gentleman playing guitar and singing Christmas songs and visiting with Santa. They even had face painting and craft making. Gabe loved walking around, dancing and looking at all the pretty decorations. He also had his first introduction to Santa. He cleared a corner and Santa was sitting on a chair and I said "look Gabe there's Santa". He looked once and then did a double take. He stood there for a minute just checking him out and then I said "Gabe can you wave to Santa?" He waived. In an attempt to get him closer, I said "Can you give Santa 5?" He gave Santa 5. Then I picked him up and put him on Santa’s lap. Nope, didn't like that and started to fuss. Gabe was more interested in the guy singing and playing the guitar.
Once we had our treat and warmed up a little, we enjoyed a hay ride around the nursery. Gabe loved it as they had a pen with some sheep in it. I wish I had taken my camera.
When we got home, Daddy trimmed the tree and brought it inside so that we could decorate it. It smells heavenly! I really love the tree. I am definitely a minimalist when it comes to decorating and my tree is no different. Just some pretty white lights and some colorful balls is all we need.
Notice the tree is small and is wedged in the corner between two couches. This is all in an attempt to keep Gabe from pulling it over or breaking the decorations. Maybe someday we will be able to put those vaulted ceilings to good use! But not this year. LOL.
Daddy putting the lights on the tree...Gabe supervising.
The tree
Monday, December 8, 2008
Mmmmm Lasagna and Homemade French Bread
Yesterday being my day off, I thought I'd try my hand at homemade French Bread to go with my homemade Lasagna. Whenever I make Lasagna or spaghetti I love to run across the street and pick up a loaf of warm French Bread from Albertsons to serve with dinner. All things bread and butter are certainly my weakness. If I had to live on bread and butter alone, I would be all too willing to do it. This recipe took a little time, but was really quite easy. I don't mind recipes that take time if I can get things done whilst I make it and with this bread I could. The only problem I ran into with my bread was that I was all out of eggs so instead of doing an egg wash on top of my bread I just used some olive oil. I think that may be why it didn't brown as much as it should have. Needless to say, I was quite proud of myself for making it at home as opposed to running across the street and buying it from the store and it made for a yummy dinner and a yummy smelling house!
Grandma’s French Bread
from The Sister's Cafe
2 ¼ c. warm water
2 T. sugar
1 Tbsp yeast
1 Tbsp salt
2 Tbsp oil
5 ½ -6 cups flour-stirred before measured
Dissolve sugar and yeast in the warm water. Let this proof—or sit for a few minutes until it bubbles. Then add salt, oil and 3 cups of flour and beat well. Add in 2 1/2 -3 more cups of flour. The dough should clean off the sides of the bowl and not be too stick - but be careful not to add too much flour. Knead for a few minutes.
Leave the dough in the mixer to rest for 10 minutes and then stir it down (turn on your mixer for 10 seconds) and then allow to rest another 10 minutes. Repeat for a total of 5 times. Then turn dough onto a floured surface and divide into two equal parts. Roll each part into a 9x13 rectangle. Roll dough up, starting from long edge of loaf to seal. Arrange seam side down on large baking sheet that’s been sprinkled with corn meal, allowing room for both loaves. Repeat with second part of dough. With a sharp knife, cut 3 gashes at an angle on the top of each. Cover lightly; allow to rise 30 minutes. Brush entire surface with egg wash (one egg beaten slightly with 1 Tbsp of water). If desired, sprinkle with sesame seeds. Bake for 30 minutes at 375 degrees.
Nats Homemade Lots a Layers Lasagna
1 Package of oven ready Lasagna sheets
1 container of Ricotta cheese (can use reduced fat if you want)
2 eggs lightly beaten
touch of salt
touch of pepper
1 Tbl spoon dried basil
2 cups of parmesan cheese (I only use freshly grated)
2 cups of mozzarella cheese
1 cup of cheddar cheese ( I use sharp)
1 cup of milk
olive oil
1 pound of hamburger meat (you could use more if you like more meat)
2 cans or containers of marinara sauce
Preheat oven to 380 degrees.
Step one- Brown hamburger meat in a small amount of oil (I always use olive oil) until no longer pink. Season with a little salt and pepper. Once meat is cooked through add the two containers of marinara sauce. Set aside.
Step two- In a small bowl, mix container of ricotta cheese, two eggs (lightly beaten) dried basil, 1 cup of mozzarella cheese and one cup of parmesan cheese. Set aside
Step three- To make cheese sauce melt 2 tbl spoons of butter in a saucepan. Once butter is melted add 2 tbl spoons of flour to make a paste. Add 1 cup of milk to paste and whisk until smooth (stirring constantly). When white sauce begins to thicken add one cup of cheddar cheese. Once cheese is melted set aside.
To layer lasagna begin with a small amount of red meat sauce mixture on the bottom of Lasagna pan. Sprinkle a small amount of parmesan and mozzarella cheese on top of red sauce mixture. Follow with a layer of noodles. On top of the noodles carefully spread some of the ricotta cheese mixture (be sure not to use too much so that you have enough for all layers). On top of the ricotta mixture spread another thin layer of the red sauce mixture and repeat. First red sauce, sprinkle with cheeses, layer of lasagna noodles, ricotta mixture, red sauce, layer of cheeses, noodles and repeat until you have used all lasagna noodles.
Bake at 380 for 45 minutes. When cooked remove from the oven and let sit for 15 minutes so as to allow cheese to set up. (I'm never good at this part!)
Depending on how big and deep your lasagna pan is this recipe can make two lasagna dishes. One bigger one and one small. The deepest dish I have for lasagna is a 2 quart oval shaped corn ware dish. From this recipe I can usually make a 2 quart sized lasagna and a 1.5 quart sized lasagna. Depending on how deep the dish is, this recipe could probably make one 9x13 sized lasagna.
Note- For ease in layering the lasagna noodles, I boil them until they become flexible prior to making the lasagna, cool them on foil and then cut them to fit the pan. I am yet to find the perfect lasagna dish and so use this method so that I don't have to worry about trying to break the noodles whilst hard. That never seems to work out for me.
ARGH!!! My crappy camera does not do close up's well at all. Please pardon the pics of my Lasagna.
Cinnamon Sugar Donut Muffins
Last Friday while I was blog surfing for a new dessert recipe to make for a family thing we had this weekend, I came across a recipe for Cinnamon Sugar Donut Muffins at Katskitchen (http://katskitchen.wordpress.com/).
Oh My! This is hands down my favorite kind of muffin at present. Not only to eat, but also to make. They were VERY delicious and SO easy. I actually made them three times over the weekend. I first made them on Friday night to test them out and was THRILLED when I could make them (quietly) while my 1 year old napped. Any recipe that involves a good ol wooden spoon and some elbow grease is so nice when your house is as small as mine and you can't make a whole lot of noise when the bebe is sleeping. My husband and son loved them too which is always an added bonus.
I will definitely be making these time and time again. Thanks Kat!
Cinnamon Sugar Donut Muffins
(Recipe adopted from: Laura Rebecca’s Kitchen)
1 cup whole wheat flour
1 cup white flour
1 Tbsp baking powder
1/2 tsp baking soda
1/2 tsp salt
2 large eggs
1 cup sour cream (plain yogurt)
2/3 cup packed brown sugar
4 to 8 tbsp oil
1 tsp vanilla
Topping:
1/2 stick butter, melted
1/4 cup sugar
½ tsp cinnamon
Position oven rack in the middle position and preheat oven to 400 degrees F. Line a standard muffin pan with paper cups sprayed with non-stick spray.
Whisk flour, baking powder, baking soda and salt in a large bowl. In a separate bowl, whisk together eggs, sour cream/yogurt, sugar, oil, and vanilla. Add flour mixture and mix with light strokes until the dry ingredients are just moistened. Don’t over mix; batter will be slightly lumpy.
Divide batter among the muffin cups and bake until a toothpick inserted in one or two of the muffins come out clean, 12-15 minutes.
While the muffins are baking, melt 1/2 stick butter and place in a bowl just large enough to hold a muffin. Combine 1/2 cup sugar and 1 tsp. cinnamon in a small, shallow bowl. As soon as the muffins are done, dip them one at a time in the melted butter and then roll in the sugar mixture. Set on a rack to cool.
Yields 12 standard muffins.
Friday, December 5, 2008
Meatballs with Cream sauce and a VERY messy kitchen
Another fabulous recipe from My Kitchen Cafe. I tried this one last night and really enjoyed it. I think it would have been even better had I had a little more time to prepare it and didn't have to run to a gym class half way through making it.
Gabe was "helping" me in the kitchen too. Rather while I chopped, stirred and baked he got into my ingredient cupboard and found an open bag of chocolate chips and had much delight in watching them flow from the bag to the floor. Then he decided it would be fun to climb on top of a box I had in the middle of my kitchen floor and stand there smiling victoriously, in an attempt to get my attention I'm sure.
Needless to say in amongst all the cooking madness, my kitchen was a DISASTER! Brad walked in the door from work and when he saw it his response was "Oh boy". Now that I think about it, I wish I had of taken a photo, today after a good nights sleep it actually seems quite humorous.
Back to the meatballs. These were really tasty and quite easy to make. Even Brad liked them and he isn’t a huge fan of meatballs. I was a little worried that they would taste like parsley meatballs because of the fresh parsley in the meatballs themselves and in the sauce, but I hardly even noticed it. I think the next time I make these I think I’ll even add some grated carrots, probably for color more than anything else. I’ll definitely be making these again and I am really excited to eat the left over’s for lunch today.
Meatballs with Cream Sauce
adapted from Lesli D.'s recipe posting
MEATBALLS:
1 egg, lightly beaten
1/4 cup milk
2 T. ketchup
1 t. Worcestershire sauce
3/4 cup quick oats
1/4 cup finely chopped onion
1/4 cup minced fresh parsley
1 t. salt
1/4 t. pepper
1 1/2 lb. lean ground beef
3 T. flour
CREAM SAUCE:
2 T. butter
3 1/2 T. flour
1/4 t. dried thyme
1/4 t. salt
1/8 t. pepper
14 oz. can chicken broth (If you want your sauce thicker, cut down the chicken broth to 1 cup)
2/3 cup milk
2 T. minced fresh parsley
In a bowl, combine all of the meatball ingredients EXCEPT the beef and flour. Add beef and mix well. Shape into balls. Roll in flour, shaking off excess. Place 1 inch apart on cookie sheet and bake, uncovered, at 400 for 10 minutes. Turn meatballs, bake 8-10 minutes longer or until no longer pink. Meanwhile, for the sauce, melt butter in a saucepan over medium heat. Stir in flour, thyme, salt and pepper until smooth. Gradually add broth and milk; bring to a boil. Cook and stir for 2 minutes, until slightly thickened. If using the full can of chicken broth, the sauce doesn't thicken overly much, but it is delicious that way. If you want it slightly thicker, cut down the chicken broth to 1 cup. Drain meatballs on paper towels; transfer to a serving dish. Top with sauce and parsley. Serve over rice or noodles.
Tuesday, December 2, 2008
Monday night Creamy Ranch Chicken, homemade bread rolls and playing on the floor with Daddy
I found a recipe for a Creamy Ranch Chicken on a food blog (of course) that I had been wanting to try and I have always wanted to try making homemade bread rolls on my own. So...since I was home on Monday I set out to make the two. Gabe had not napped well, since he has about eight teeth coming through at present, so at times I wanted to throw in the towel but I'm glad we both hung in there.
The Creamy Ranch Chicken did not disappoint and was soooo yummy. I'll definitely be making this one again. I was also quite pleased with myself and my rolls. They were a little on the dense side as I think I may have mixed them a little too long, but they were still yummy. There is nothing like the smell of fresh bread in the kitchen and the warm and soft goodness of a homemade buttery roll with jam on a cold wintery evening.
Creamy Ranch Chicken
adapted from Better Homes and Garden’s Quick and Easy Recipes
start to finish: 20 minutes
serves about 4
6 slices bacon
4 skinless, boneless chicken breast halves, cut into bite size pieces
2 tablespoons flour
2 tablespoons ranch dry salad dressing mix (I didn't actually have any of this so I used Ranch dressing instead)
1 1/4 cups milk
3 cups dried medium noodles(I used egg noodles)
1 tablespoon finely shredded FRESH Parmesan cheese
1. Start your water for your pasta. Cook noodles according to package directions.
2. Cut bacon into narrow strips. In a large skillet, cook bacon over medium heat until crisp. Drain bacon on paper towels; discard all but 2 tablespoons drippings.
3. In the same skillet, cook chicken in reserved drippings until no longer pink, turning to brown evenly. Sprinkle flour and salad dressing mix over chicken; stir well to coat the chicken. Stir in milk. Cook and stir until thickened and bubbly. Cook and stir 1 minute more. Stir in bacon.
4. Serve the chicken over the noodles. Sprinkle with Parmesan cheese. Enjoy!
Molly's Rolls
1 cup warm water
1 cup warm milk (I just heat it in the microwave for 30 seconds and let it sit while the yeast bubbled)
1/3 cup sugar
1 package yeast(2 1/4 teaspoon)
1/3 cup oil
1/2 T salt
1 egg
flour (I think I ended up use 4 1/2 cups)
In mixer combine yeast, sugar, and warm water; let grow until bubbly(about 5 minutes). Add milk and mix. Mix in oil and egg. Slowly add 2 cups flour, mix and then add salt. Add 1/2 cup flour at a time until it comes away from side of bowl. Let rise in mixing bowl for about 30 minutes. Form rolls as desired and place on a greased cookie sheet. Let rise and additional 30 minutes. Bake at 400 degrees for 10-12 minutes. Brush hot rolls with melted butter. I made 2 dozen with this recipe.
Always so excited when Daddy comes home!
A BIG and BUSY Thanksgiving weekend
I don't remember who's motto it was to "Go big or go home", but that sure seems to be how things have been for us lately and why not? Tis the season.
This past weekend was a big and very fun one. It all started the night before the night before Thanksgiving at my place making pies with my sister in law Shanna. Every year my mother in law has a 'pie night' the night before Thanksgiving at my in-laws house for family, friends and neighbors. There is loads of people and loads of pie. This year Shanna and I were asked to help make pies so we decided to get together at my place to make them. Though we had both been at work all day prior to our pie making venture and were a little tired we had lots of fun flouring up my kitchen. Shanna made a strawberry pie (which was sooooo good) and an apple pie and I made a mixed berry pie and a Hershies Kisses Mint cheesecake.
So on Wednesday night, we headed over to the in-laws house for a slice of pie or two, three, four and enjoyed visiting with family and friends.
On Thanksgiving, we headed to Brads Aunt and Uncles house, Terry and Cerena Welch for a thanksgiving dinner. Now I know for most people Thanksgiving means eating yourself sick and silly, but when you are a foreigner such as I and you don't like Turkey, stuffing, mashed potatoes, American yams or green bean casserole then its just a fun time to visit with family. That I did. Oh and what I didn't eat for dinner I sure made up for with dessert! I had a blast hanging out and laughing with Liz and Shanna and the other cousins and we were all thoroughly entertained by our two one year olds. Any party with two one year olds never seems to disappoint.
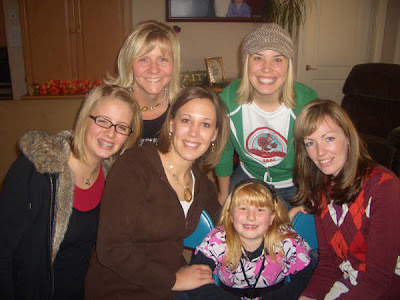
The Bentley girls.
Gabe had so much fun playing on the floor. Uncle Brian would smell his feet and say "Peeeuuu Gabe, your feet stink!" and Gabe would laugh and laugh.
This is the pear cake I made to take for dessert for Thanksgiving. A friend of mine had made it recently for a Young Women’s thing and I just had to have the recipe. I don't even like pears but this cake is moist and refreshing, not to sweet and sickly. It is served with a divine homemade caramel sauce.
Thanksgiving also happens to fall on my little nephew's birthday and this year it was his first! So after dinner, Shanna came to my house and helped me make a special birthday cake for Andrew. In all honesty I didn't have as much time and or energy to work on it as i would have liked but I was still pleased with the end result. I was so thankful that Shanna was there to keep me sane whilst I frosted away and was willing to help out when my hand was paralyzed from all the squeezing. Once the cake was ready to go we went to Blake and Liz's house for a little cake and ice cream party for Andrew and had more fun visiting while the CRAZY shoppers in the family sifted through adds for the big day after sales.
The train cake.
On Friday morning we had a lovely brunch for the married Bentley kids at our place. I attempted to decorate a nice table and we had yummy breakfast casserole (made by Liz), strawberry stuffed French toast, pancakes, fruit, milk and juice. Again we had fun visiting some more and laughing at the little ones. No shopping for us this year. Instead we enjoyed hearing the stories of Brian and Shanna who had been up since some unholy hours in an attempt to get some great deals.
Saturday and Sunday were spent at home cleaning the house, raking leaves, napping and generally just recovering from all the family get-togethers. Gabe had fun raking leaves with Daddy and even enjoyed a little pie of his own...mud pie that is. On Sunday night we did have some fun finger painting with Gabe though.
Notice the dirt around his mouth!
What touches the hands, must also touch the mouth!
This year our little family has much to be thankful for and i could go on and on. Most importantly though, we are thankful to have each other and we were so grateful for the time we had this past weekend to be together. We hope you all had a wonderful thanksgiving and we send our love and best wishes for a memorable Christmas season. Go do some good!
Subscribe to:
Posts (Atom)