Tuesday, February 17, 2009

Chicken Satay with Peanut Sauce

Last week I stumbled accross a new food blog that has lots of yummy recipes. The blog is http://www.goodeatsblog.com/. A while back I had to organize for a lunch to be catered at work and decided to use a lady in my neighborhood who has a small catering business out of her home. She made Chicken Satay with Peanut Sauce and I loved it so much that I had been hunting for a recipe for it ever since. When I came across this one, I was so excited to make it for Valentines Day. It was good but not great and I wanted great. The Satay chicken was flavorful and what I had wanted but I wasn't too impressed with the peanut sauce. It was a little too peanut butter tasting for my liking. I was looking for a more authentic peanut flavor. So the hunt continues.

Chicken Satay
from Allrecipes.com


2 tablespoons creamy peanut butter
1/2 cup soy sauce
1/2 cup lemon or lime juice
1 tablespoon brown sugar
2 tablespoons curry powder
2 cloves garlic, chopped
1 teaspoon hot pepper sauce (I used Sambal Oelek Chili Paste)
6 skinless, boneless chicken breast halves - cubed

In a mixing bowl, combine peanut butter, soy sauce, lime juice, brown sugar, curry powder, garlic and hot pepper sauce. Place the chicken breasts in the marinade and refrigerate. Let the chicken marinate at least 2 hours, overnight is best.

Preheat a grill to high heat. (I used my George Foreman grill.)

Weave the chicken onto skewers, then grill for 5 minutes per side. (With the George Foreman grill, I find it takes only about 3-5 minutes total, depending on how big your pieces of chicken are.) I actually didn't skewer mine but just cut the chicken into small tender size pieces.

Yield: 12 Servings.

Peanut Sauce
from Tyler Florence

1 tablespoon peanut oil
1 green onion, thinly sliced on the diagonal
1/2-inch piece fresh ginger, minced
1-2 garlic cloves, minced
1/2 teaspoon red chili paste, such as Sambal Oelek (omit this if you don't tolerate spicy foods well)
1 tablespoon brown sugar
1/4 cup creamy peanut butter
1-1/2 tablespoons rice vinegar
1-1/2 tablespoons soy sauce
3 tablespoons hot water

In a small saucepan, heat the peanut oil over medium-low flame. Add the green onions, ginger, garlic, and chili paste. Cook and stir for a minute until soft and fragrant. Mix in the brown sugar, peanut butter, vinegar, soy sauce, and hot water. Stir until the sugar is dissolved and the peanut butter has smoothed out.

Valentines Day- It all started on Thursday

I got totally spoiled this past weekend. It all started on Thursday. It had been a crappy week to say the least, but when I got home from the gym on Thursday night Brad and Gabe had been to the florist and bought me a bunch of red tulips. Tulips are my most favorite flower! That definitely put a smile on my face.

On Saturday when I got home from the gym there were more tulips on the kitchen table with a gorgeous card from Brad and a painting from Gabe. Gabe just loves to finger paint and I just love it when he and Daddy get together to paint for me. Gabe was so proud to show me his picture and his little face just melted me.

A little later on Saturday Brad gave me a special gift he had spent a bunch of time making. It was the best gift of all. He had put together a pictures to music DVD of our little family with some of my favorite songs that was 30 minutes long. Needless to say I was a mess while I watched it. So many fun and special memories flooded back whilst watching this special DVD. One thing that was particularly special about the DVD was the second song. Ever since we picked Gabe up I have sung two songs to him consistently. We have dubbed them our songs and Gabe loves them. One is "You are my Sunshine" and the other is "My Girl"- which of course is changed to say "My Boy or My Gabe". The second song on the DVD was the song "You are my Sunshine". It couldn't have been more perfect. Whenever I sing it to Gabe he smiles and sways and then claps when I'm done. Then Brad surprised me and told me that once we had Gabe down for the night his brother Blaine was going to come over and listen for Gabe while we went to a movie. We hadn't been to a movie or on a date in I don't know how long and so I was SO excited.

For lunch on Saturday we went to a local place and enjoyed some good Greek food. Rather than go out and fight the crowds this year I wanted to make us a special Valentines Dinner. We had Chicken Satay with Peanut Sauce over rice and then for dessert one of our favorite cakes/slices Pumpkin Chocolate Chip Squares with homemade Caramel Sauce and vanilla ice cream (recipes to follow). It was delicious. It is funny to me how my love of cooking has translated into me never wanting to go out to eat anymore. The only time I really feel like going out to eat is if I am craving a good piece of fish, otherwise I enjoy cooking and eating in more these days.

Once Gabe was in bed we headed off to the movies. Funnily enough we didn't even know what movies were out. When you have husband in school with mounds of homework, work full time, and a baby what's out at the movie theatre suddenly doesn't seem so important. My brother Josh had been to see a movie called "Taken" the night before and strongly recommended it so we went with that. We were so glad that we did. It was an AWESOME movie and everyone who loves a good action flick should definitely see it. I would definitely call it a "must see".

I thoroughly enjoyed Valentines Day this year and the weekend with my two favorite boys and I am so thankful to have such a wonderful husband. I love you Brad! Thank you for the perfect ending to a rough week.

Thursday, February 12, 2009

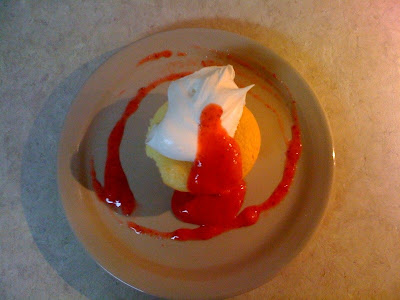
Yummy Gluten Free Strawberry Shortcakes

Last night as part of our Young Women’s activity we had a nice dinner and enjoyed some dessert together. I was responsible for making the dessert. One of my young women has issues with gluten and so is on a gluten free diet. I found this recipe for Gluten Free Strawberry Shortcakes a while back. We went to this same girl’s house for dinner once and I made this recipe then to take for dessert. She loved it so much, that I thought I'd make it for her again. The rest of the girls and leaders enjoyed these too. If you have a friend or a loved one who also has issues with gluten I guarantee that they will love this sweet treat!

Gluten Free Strawberry Shortcakes
www.recipezaar.com

Ingredients
1/2 cup butter
1 cup icing sugar
4 eggs
1 teaspoon vanilla
1 cup cornstarch
1 1/4 teaspoons baking powder

Directions

1-Preheat oven to 375 degrees. Grease a 12-muffin pan.
2-In a large bowl cream butter and sugar, using electric mixer.
3-Add the eggs and vanilla. Beat until light and fluffy.
4-In a small bowl mix the cornstarch and baking powder together and add slowly to the creamed mixture. (If added too quickly, it will fly about the kitchen.).
5-Mix until well blended.
6-Fill the greased muffin tins half full.
7-Bake for 15 minutes. (Test with a toothpick, after 15 minutes, even if the top looks shiny).
8-Remove from the pan while still warm. (They will look like little cupcakes.But trust me they will taste just like little shortcakes).

9-Serve topped with strawberries, and whipped cream.


Sorry again for the poor photo quality. Lighting was bad and I used my hubby's camera on his phone to take them.

Tuesday, February 10, 2009

Taco Stuffed Shells

Here is another great recipe from Mmm Cafe. I made these for dinner on Sunday night. Brad really enjoyed it. To be completely honest, I don't know that I will make these again. This is totally a personal issue. Growing up I think we had "Tacos" one to many times and so now anything with taco flavor or seasoning just doesn't sound or taste overly great to me. I am not a big fan of Mexican food either. That being said, I can appreciate this recipe for what it is. If you like Mexican food and more specifically Tacos then you will love this recipe. It's just not for me.

Taco Stuffed Shells
From: Blog Chef

1lb ground beef
1 package taco seasoning
1 4 once package cream cheese
12 large pasta shells
1 cup salsa
1 cup taco sauce
1 1/2 cups mexican blend shredded cheese
1 ½ cups tortilla chips (crushed)
1 cup sour cream

Step 1: In a fry pan cook ground beef and add taco seasoning and prepare according to package directions. Add cream cheese, cover, and simmer until cheese is melted. Blend well. Set aside and allow slightly cool. While burger is cooking cook the pasta shells, drain.
Step 2: Pour salsa in the bottom of a 9 x 13 inch baking dish.
Step 3: Stuff each shell with the meat mixture. Place the stuffed shells in the baking dish and cover the tops of the shells with taco sauce.

Step 4: Cover with foil and bake in the oven at 350 degrees for 30 minutes.
Step 5: After 30 minutes, uncover, and sprinkle crushed chips and shredded cheddar and Monterey jack cheeses on top. Cook for 15 additional minutes. Serve with sour cream, additional salsa, and anything else that you like to serve with tacos.

Photos from Mmm Cafe blog. http://mmmcafe.blogspot.com

Mmmmmm Cheesecake...Again

I told you that this past weekend I was in the mood to make and eat cheesecake. Well those who know me know that when I set my mind to something you don't have much of a prayer in stopping me. So once I had my fix with making my Mini Cheesecake Tarts, I tried another new cheesecake recipe.

I found this cheesecake recipe on My Kitchen Cafe's blog. This is by far the creamiest baked cheesecake I have made and tasted to date. The consistency was much like my no-bake cheesecake recipe. Needless to say I loved it and will make it time and time again. It was extremely easy. Baked cheesecakes have always made me a little nervous with their tendency to crack etc. This one however was a breeze!

On Sunday night we had my brother in law Blake and his wife Liz and their little boy Andrew over for dessert and even my brother in law who admittedly is not a huge cheesecake fan enjoyed it and much to my surprise had seconds. I was VERY pleased. The biggest compliment however, came when he said "This is really good, did you make it?" Thanks Blake you made my day!

The Ultimate Cheesecake
adapted from Tyler Florence

Crust:
3 cups finely ground graham crackers (about 40 squares)
2 tablespoons sugar
3/4 cup butter, melted

Filling:
2 (8-ounce) blocks cream cheese, room temperature
1 cup sugar
3 eggs
1 teaspoon vanilla extract
1 lemon, zest finely grated
1 pint sour cream

To prepare crumb crust: In a mixing bowl, combine the crust ingredients together with a fork until evenly moistened. Lightly coat the bottom and sides of a 9-inch springform pan with non-stick cooking spray. Firmly press the mixture over the bottom and 1-inch up the sides on the pan, use your fingers or the smooth bottom of a glass. Refrigerate the crust while preparing the filling.

To prepare filling: In a large bowl (I used my food processor), beat the cream cheese on low speed for 1 minute just until smooth and free of any lumps. Gradually add the sugar and beat until creamy, 1 to 2 minutes. Periodically scrape down the sides of the bowl and the beaters. Add the eggs, 1 at a time, and continue to slowly beat until combined. Stir in the vanilla and lemon zest. Blend in the sour cream. The batter should be well mixed but not overbeaten. Overbeating incorporates too much air and will cause the cake to puff when baking, then fall and crack when cooling. Pour filling into the crust-lined pan and smooth the top with a spatula.

Bake in a preheated 325 degree oven for 50-55 minutes (I cooked it the full 55 Minutes). The cheesecake should still jiggle slightly, don't panic like I almost did - it will firm up after chilling. Be careful not to overcook! Do not do a toothpick test in the cake's center, this will make a crack. Loosen the cheesecake from the sides of the pan by running a thin metal spatula around the inside rim. Let cool in the pan for 30 minutes. Chill in the refrigerator, loosely covered, for at least 4 hours to set up. Demold and transfer to a cake plate. Slice the cheesecake with a thin, nonserrated knife that has been dipped in hot water and wiped dry after each cut.


I love cheesecake plain so that I can taste and fully appreciate all of the cream cheese goodness. However, my husband prefers it with some kind of topping. The only thing I had on hand was some frozen strawberries. I thawed the strawberries and sprinkled them with some sugar and let them sit out and sweat for a couple of hours until all of the juice and flavor had released. I then blended the strawberries in my magic bullet. Simply pour over each individual piece of cheesecake and ENJOY! We sure did!

Mini Cheesecake Tarts

This past weekend I was in the mood to make and eat cheesecake. While searching for some new cheesecake recipes to try, I came across this one for Mini Cheesecake Tarts from Stephanie’s Kitchen. I LOVE LOVE LOVE cheesecake! It is by far my favorite dessert. These were SO incredibly easy to make, were SO delicious and looked so cute. The photos really don't do these justice. I took them with Brads I Phone.

On Saturday we got together with some of my family to celebrate two of my brothers birthdays and I decided to give some of them away as gifts. I don't think there is one person in my family that doesn't love a good piece of cheesecake so I knew my brother Ben would appreciate them.


Mini Cheesecake Tarts
makes 6 mini tarts
1 package (8 oz) cream cheese, softened
1/2 cup granulated sugar
1 egg
1/2 teaspoon vanilla
crust of your choice- See note

1. Mix the sugar and cream cheese until creamy - I used my food processor to do this. Add egg and vanilla, mix until creamy and smooth. Fill tarts to the rim and bake at 350 degrees for 15-20 minutes, or until set- I had to cook them for the full 20 minutes. Let them cool out of the oven and then refrigerate. Once they have cooled completely in the refrigerator decorate with your favorite topping.

I whipped and then stabilized some cream and piped small stars around the edge of the cheesecake and then filled them in the center with strawberries. If strawberries were in season, I would have used fresh strawberries but since those were not available I just bought strawberries in syrup which you can buy from most supermarkets. I have bought them at Wal-mart and also Albertsons. They are usually in the frozen fruit section right by the frozen fruit and come frozen- You just have to let them thaw out a little before you want to use them.

***NOTE*** For the crusts I opted for easy and followed Stephanie’s lead and purchased some pre-made mini graham cracker crusts. They come 6 in a pack and I found them at Albertsons (Wal-mart didn't stock them.) They made these mini cheesecake tarts so easy to make and the crusts were absolutely delicious.


Three Cheese Manicotti with Chicken

I found this recipe on MMM Cafe's blog and modified it a little. The original recipe didn't call for chicken but given that I was going to be feeding this to my baby I wanted a way to sneak in some protein. It worked well and Brad couldn't get enough of these. I'll definitely be making these again.


This picture is from Mmmm Cafe's blog. I took a before but not an after pic-My boys were hungry and I got distracted =)

1 box of uncooked manicotti shells
1 (15 ounce) container ricotta cheese
3 1/2 cups shredded mozzarella cheese
1/2 cup grated Parmesan cheese
1 egg, beaten
1 teaspoons dried basil
1 teaspoons dried oregano
1/2 teaspoon onion powder
1/2 teaspoon garlic powder
1/2 teaspoon seasoned salt
leaf spinach, minced (optional)- I omitted the spinach this time, but I have added it before and it is yummy.
3 cups spaghetti sauce
2 smallish chicken breasts

Cut chicken breasts into bite size pieces and cook thoroughly. Once the chicken is cooked in a blender or food processor blend the chicken (you could also boil and shread the chicken)- See note below. Cook the manicotti to al dente, about 7-8 minutes. Meanwhile, in a bowl, combine the ricotta cheese, 2 cups mozzarella cheese, parmesan cheese, egg, seasonings, half a cup of spaghetti sauce, chicken and spinach(optional).

Spread 1 1/2 cups of spaghetti sauce on the bottom of an 9x13 baking dish. Stuff manicotti shells with cheese mixture; arrange over sauce. Top with remaining sauce.


Cover and bake at 375 degrees F for 35-40 minutes. Uncover; sprinkle with remaining mozzarella cheese. Bake 10 minutes longer or until cheese is melted and manicotti is heated through.

***NOTE*** I had made these before and had quite the time trying to stuff the manicotti noodles with the cheese mixture. This time I got smart and used a piping bag and piped the mixture into the noodles and it worked like a charm. Much easier, allot less messy and a million times faster. The original recipe called for only 10 uncooked manicotti noodles, but I found that the mixture made much more than 10 noodles. This recipe could easily make a 13x9 pan full.

Thursday, February 5, 2009

My Floury Little Helper

I had to post these pictures.

Last night while I was making a cheesy garlic Stromboli to go with dinner Gabe decided he wanted to help. We have been battling him for a few months now as he likes to climb onto the kitchen chairs and then onto the kitchen table (NOT safe). He tends to do this when I am cooking or cleaning the kitchen, I'm sure in an attempt to get Mummy's attention. Rather than getting mad at him for doing this (which I tried but had no success with) I decided that to try and take the michevious fun out it and while I am cooking or cleaning the kitchen I bring the kitchen chair over to where I am and let him stand on it beside me while I do my thing. Usually I set him up right beside me so that he has access to our utensil draw and that keeps him entertained while I work. Last night I was flouring the kitchen bench in preparation to roll the dough and as soon as the flour was on the bench and within his reach he leaned over and put his hand in it, and proceeded to wipe it down his face and through his hair. Not sure why, but it did make for some funny pics and he kept saying "Mmmmmmmmm."


Candy Bouquet

Last night when we were sitting down to eat dinner, we noticed someone walk up to our front door, make a delivery and then walk away. I ran out to see who and what it was and this is what I found...

It was the perfect end to a busy night. My yummy treat was accompanied by a very sweet thank you card.
Thank you Amber! You are such a sweet friend and you know I love you!

Tuesday, February 3, 2009

Wacky Cake- America's Test Kitchen

Another recipe from my America's Test Kitchen cookbook. This recipe for Wacky Cake caught my eye when I noticed that it didn’t contain eggs, milk or butter. It also has a very interesting method of preparation (see picture below). One of the things I love about my America's Test Kitchen cookbook is that with some of it's recipes it gives a little history of how the recipe came to be. This one was of particular interest to me.

This is what my book said:
While the name implies comical roots, Wacky Cake was actually born out of the seriousness of wartime rationing. At various times during the world wars, eggs, butter, sugar, and milk were all in short supply, so inventive home cooks and home economists did their best to create dishes with limited ingredients. Wacky cake is a moist chocolate cake prepared, miraculously enough, without eggs or butter.

After reading this I couldn't help but be grateful for all of the wonderful ingredients we have at our disposal. Despite these hard economic times, we truly are lucky and things really could be worse. I also thought about how amazing those women must have been to survive such a hard time cooking for their families when necessities weren't readily available to them. I think it is so cool that even though this cake was born during wartime that the women still took the time to invent a chocolate cake they could make. I like to think they did it to lift the spirits of their families. I can see this being a favorite birthday cake back then.


Wacky Cake (moist chocolate cake)

America's Test Kitchen cookbook


(this is a picture from http://itsdinnertime2.blogspot.com)

Ingredients:
1 1/2 cups unbleached all-purpose flour
1 cup sugar
3 tablespoons unsweetened cocoa
1 teaspoon baking soda
1/2 teaspoon salt
1 teaspoon vanilla
1 teaspoon vinegar
5 tablespoons vegetable oil
1 cup cold water

Preparation:
In the 8x8 pan mix flour, sugar, cocoa, soda and salt. Make three wells in the flour mixture. In one well put vanilla; in another the vinegar, and in the third the oil. Pour the cold water over the mixture and stir until moistened.


Bake at 350°F. oven for 25 to 30 minutes, or until it springs back when touched lightly.

Though this cake is usually served without frosting, I made a simple chocolate frosting to pour over the cake as soon as it came out of the oven. Just a little butter, vanilla, cocoa, icing sugar and milk. I just make it to taste. This cake is so incredibly moist and much to my pleasant surprise was just as moist- if not more so the next day. Though I have been craving this since I made it on Friday night I don't think I'll be making it any time again soon. Brad and I ate the whole cake ourselves over the course of two days. YIKES. It really was that good though!

Bread and butter- It's what I live for!

If I had to live on bread and butter alone- I could do it and would do it with a HUGE smile on my face. I have decided that bread and butter is the devils food! On Sunday I tried this recipe for Divine Breadsticks from My Kitchen Cafe to accompany our lasagna for dinner and they were awesome!

Divine Breadsticks
1 ½ cup warm water
1 tablespoon yeast
2 tablespoons sugar
3 ½ cups flour
½ teaspoon salt
Butter for the pan and for brushing over the top of breadsticks

Mix all ingredients (except butter) and knead for three minutes. Let stand 10 minutes. Heat oven to 375 degrees. Melt desired amount of butter on baking pan- I used about 3 or 4 tablespoons. Roll out dough about 1/8-inch thick and cut into strips (see pictures below). Place in butter and put close together. Sprinkle with garlic salt and parmesan cheese. Cover and let rise 30 minutes. Bake 20 minutes at 375 degrees.


Once I have cut these I take each one and twist it before putting it on the buttered tray.

I had a McCormack garlic bread sprinkle that I sprinkled on mine and then I added some Italian herbs I had. The garlic bread sprinkle has garlic, salt and cheese in it. You could put whatever you wanted on them really.


On Monday night I made this cheesy bread to go with dinner and it is the yummiest cheesy bread I have had to date. The best part was that it was just as good the next day! I found the recipe on www.elise.com. This was unlike any other cheesy bread I've ever tasted. The topping was creamy and delightful! Brad really liked it too which is saying something. That boy is hard to please!

Cheesy Bread Recipe


Ingredients
8 oz shredded Mozzarella cheese
1 lb shredded sharp cheddar cheese
1/4 cup of freshly grated parmesan cheese
1/2 to 1 cup chopped green onion (to taste)
1/2 cup mayonnaise
2 Tbsp sour cream (optional)
3-4 cloves garlic, minced
1 stick unsalted butter (1/2 cup, 4 ounces), softened to the point of being slightly melted
1 to 2 loaves of French or Italian bread (I used French load), depending on the size of the loaves (see note below)

Method
1 In a large bowl, mix together the cheeses and the green onion. Stir in the mayonnaise and sour cream. In a separate small bowl blend the butter and garlic until smooth. Add the butter mixture to the cheese mixture.
2 Preheat broiler. Slice loaf of bread in half horizontally, lay crust side down. Spread cheese mixture over the bread. Place under the broiler until nicely browned, about 3 to 5 minutes.
3 Remove from broiler and let sit for 5 minutes until cool enough to handle. Slice the bread with a bread knife. Serve.

Makes 30 to 40 slices.

***Note*** For my cheesy bread I just purchased a French loaf from my local supermarket and cut it in half lengthways. I used all of the mixture for my two halves which was divine, but there was plenty of topping and I easily had enough for another French loaf. The next time I make this (just to save my hips) I'll halve the recipe.