Monday, June 29, 2009

Lemon Cream Pasta with Chicken

I saw this recipe on Melanie from My Kitchen Cafe's blog a while back and had been excited to try it. I finally got around to making it this past week. It was delicious. I had wondered if the cream added to the sauce may make it heavy but it was just the opposite. As Melanie said about this dish on her blog - "Creamy and light." I'll definitely be making this dish again.

Lemon Cream Pasta with Chicken
adapted from allrecipes.com via Clouse Cousins Cookin'

Serves 4-6

3 cups shredded or cubed Lemon Garlic Chicken (recipe follows)
1 teaspoon garlic powder
1/2 teaspoon black pepper
4 (14.5 ounce) cans chicken broth
1/2 cup fresh lemon juice
1 (16 ounce) package tube pasta (I used shells because it is what I had)
2 cups heavy cream
2 teaspoons grated lemon zest
1/2 cup parmesan cheese, shredded

DIRECTIONS
In a large saucepan, season the chicken broth with the garlic powder and pepper. Bring to a boil and add lemon juice and pasta. Cook over medium heat, stirring occasionally, until all liquid is absorbed, about 25 minutes.

Stir chicken into cooked pasta, along with the cream, parmesan cheese and lemon zest. Cook, stirring, over low heat for 5 minutes. Remove from heat and let stand 5 minutes. Stir thoroughly before serving.

Lemon Garlic Chicken
Erin W.

Juice of 1 lemon, approximately 3 tablespoons
3 tablespoons olive oil
1 teaspoon minced garlic, about 2 medium cloves
1 teaspoon salt
1/4 teaspoon pepper
1/2 teaspoon dried oregano
1 pound chicken breasts (I usually cut really thick chicken breasts down to thin them out and make the pieces a little smaller so they absorb the marinade better)

Combine all marinade ingredients. Place chicken in a ziploc bag or tuppaware container and pour marinade over chicken. Place in fridge overnight. Grill (or cook in frying pan). Serve with sides of your choice or cut into bite sized pieces and add to desired recipe (I'll be sharing a few with you soon). Note: If you cut your chicken into smaller, bite-sized pieces and then marinate it, you can get away with only letting it marinate for 5 or 6 hours instead of overnight.

Saturday, June 27, 2009

The Farmington Whoop dido’s

I had to share these pictures. They were too cute not to share. Keep in mind that I was sitting in the front seat taking these whilst bumping up and down and laughing hysterically all while I had my seatbelt on of course.

In Farmington there are two roads that link up that have these fun "The Whoop dido’s." At least that is what my husband calls them. I would just call them big dips in the road. Anyway, this particular road is right by the horses we go and visit on a regular basis. This last time we went to see the "horsies" I happened to have my camera and so took these shots of Gabe as we went over the bumps. We have been over these so many times, that by now he knows the road and within half a mile of the actual bumps he starts getting excited or anxious about what is ahead.

Enjoy!

Recognizing the road- He knows what is coming

Quick ditch the bottle and brace. This was the first time he covered his ears as we approached the "Whoop dido’s." Not sure what that was about.

Uh oh here we go... You can actually see his stomach drop. We are so mean!

Ah that was fun! Cutest smile EVER!

Uh oh here comes another one. It's a nail biter.

Quick cover your ears...you don't want to hear this!

Here we go

Midflight

Awesome!

Friday, June 26, 2009

La'ai's Samoan Sapasui or Chop Suey

Chop Suey is a dish that I have loved for as long as I can remember. I'm not sure when the first time I ate it was or whether I first had it while living in New Zealand or if I first ate it in Australia. Either way it would have likely been prepared by a New Zealand Maori native or a Samoan or Tongan islander native. Growing up in both New Zealand and Australia I would say that there was a fairly strong Maori/Samoan/Tongan influence in my life. Whether it be friends, family, food or church, the islands were always present in one shape or form. This is one of my favorite island dishes for sure. Before making this dish this time around, I hadn't eaten it since I lived in Australia so I was excited to have it once again. It didn't quite look like I remembered but it tasted spot on. Ahhh the islands.

Chop Suey
http://polynesiankitchen.blogspot.com


2 lbs. chopped beef (chuck steak) or chicken (I used chicken)- cubed and cooked through
5 cloves garlic (chopped)
1 tsp ginger – I used fresh minced ginger
1 cup soy sauce
1 half head of cabbage chopped(veggies can be fresh or frozen)
Approx 1 cup of baby carrots chopped
1 cup beef or chicken broth
1 bag of Long Rice Noodles (I just found a bag at my local Wal-mart)
3 Tbsp. oil

Prepare noodles – bring 3 quarts water to a boil. Add noodles and turn off heat. Soak noodles until softened.

Sauté meat in oil for 3 minutes. Add garlic and ginger and continue cooking for 2 more minutes. Add broth and soy sauce and cook 5 more minutes. Drain noodles and stir into meat mixture with vegetables. (You may have to add more liquid as needed as the noodles may absorb some of the liquid.

** Depending on your cut of meat, you may boil tougher cuts for ½ hour before sautéing.

Thursday, June 25, 2009

Crockpot Buttermilk Ranch Chicken

I came up with this recipe on Monday when I realized that I didn't have some of the ingredients I needed for my planned dinner. I was having one of those days where I was having too much fun being home with Gabe playing, that I couldn't be bothered going to the store to grab a few items. I was able to make this using ingredients I already had at home which is always nice. Another huge plus was that it was quick and easy to put together and then the crock-pot just did the rest. Dinner is served!

Crockpot Buttermilk Ranch Chicken
By Nat

Serves 4-5 people

Ingredients
4 large chicken breasts (mine were frozen but I thawed them before cooking)
2 cans of cream of chicken soup
1 package of dry ranch dressing mix
2 tablespoons of butter (cut into cubes)
1/2 cup of buttermilk]
1 tablespoon of cornstarch
2 tablespoons of water

Add soup, dressing mix, butter and buttermilk to crock-pot and stir to combine. Add thawed chicken breasts and cook on low for 6 hours. Just prior to serving mix cornstarch and water together and then add to crock-pot (just to thicken the sauce a little). Once sauce has thickened and is the desired consistency serve over a bed of rice or buttered noodles.

Wednesday, June 24, 2009

Baked Manicotti

I am pretty sure that I have mentioned before my love of Italian food. I can't get enough of the stuff. If I lived alone I would eat Italian every day. An Italian lady I worked with in Australia made the BEST authentic Italian tomato pasta sauce I have ever tasted and even now I can taste it if I think hard enough about it. Her name was Luciana Garofollo - How's that for Italian? Her husband's name was Bruno. When I was about 19 or so she and her husband went overseas on a trip (can't remember where) and she had me stay at her house and look after her three sons. They had a very large and gorgeous home that was very Italian in style and a backyard that was littered with terracotta. Lovely! Before Luciana left on her trip, she spent weeks preparing meals for us to eat in their absence. She had them all neatly placed in Tupperware containers with labels and they were stacked in her freezer. I simply had to reheat them. I don't think I have ever eaten so well. I begged her to adopt me. I WILL MAKE IT TO ITALY SOMEDAY and when I get there, I'm sure I'll gain 20 pounds eating myself silly.

I saw the cooks at America's Test Kitchen make this dish one Saturday on PBS. From the moment I watched them make it, I knew I had to add it to my menu. It did not disappoint me. I especially loved that the recipe used the lasagna sheets negating the need to break out my pastry bag to stuff the shells. This was easy to make and was oh so delicious!

Baked Manicotti
America's Test Kitchen


INGREDIENTS

Tomato Sauce
2 28-ounce cans diced tomatoes (in juice)
2 tablespoons extra-virgin olive oil
3 medium cloves garlic , minced or pressed through garlic press (about 1 tablespoon)
1/2 teaspoon hot red pepper flakes , optional
Table salt
2 tablespoons chopped fresh basil

Cheese Filling and Pasta
3 cups part-skim ricotta cheese
4 ounces grated Parmesan cheese (about 2 cups)
8 ounces shredded mozzarella cheese (about 2 cups)
2 large eggs , lightly beaten
3/4 teaspoon table salt
1/2 teaspoon ground black pepper
2 tablespoons chopped fresh parsley leaves
2 tablespoons chopped fresh basil
16 no-boil lasagna noodles (see note above)

1. For the Sauce: Adjust oven rack to middle position and heat oven to 375 degrees. Pulse 1 can tomatoes with their juice in food processor until coarsely chopped, 3 or 4 pulses. Transfer to bowl. Repeat with remaining can tomatoes.

2. Heat oil, garlic, and pepper flakes (if using) in large saucepan over medium heat until fragrant but not brown, 1 to 2 minutes. Stir in tomatoes and 1/2 teaspoon salt and simmer until thickened slightly, about 15 minutes. Stir in basil; adjust seasoning with salt.

3. For the cheese filling: Combine ricotta, 1 cup Parmesan, mozzarella, eggs, salt, pepper, and herbs in medium bowl; set aside.

4. To assemble: Pour 1 inch boiling water into 13 by 9-inch broiler safe baking dish, then add noodles one at a time. (NOTE: I used about 4 cups of boiling water — it was more than an inch high, but the noodles weren’t completely covered otherwise.) Let noodles soak until pliable, about 5 minutes, separating noodles with tip of sharp knife to prevent sticking. Remove noodles from water and place in single layer on clean kitchen towels; discard water in baking dish and dry baking dish.

5. Spread bottom of baking dish evenly with 1 1/2 cups sauce. Using soupspoon, spread 1/4 cup cheese mixture evenly onto bottom three-quarters of each noodle (with short side facing you), leaving top quarter of noodle exposed. Roll into tube shape and arrange in baking dish seam side down. Top evenly with remaining sauce, making certain that pasta is completely covered.

6. Cover manicotti with aluminum foil. Bake until bubbling, about 40 minutes, then remove foil. Remove baking dish, adjust oven rack to uppermost position (about 6 inches from heating element), and heat broiler. Sprinkle manicotti evenly with remaining 1 cup Parmesan. Broil until cheese is spotty brown, 4 to 6 minutes. Cool 15 minutes, then serve.

STEP BY STEP: Manicotti 1, 2, 3

1. Soak no-boil lasagna noodles in boiling water for 5 minutes until pliable, using tip of paring knife to separate noodles and prevent sticking.

2. Using soupspoon, spread about 1/4 cup filling onto three-quarters of each noodle, leaving top quarter of noodle exposed.

3. Roll each noodle by hand and place in baking dish, seam side down.

A note from the kitchen- We prefer Barilla no-boil lasagna noodles for their delicate texture resembling fresh pasta. Note that Pasta Defino and Ronzoni brands contain only 12 no-boil noodles per package; the recipe requires 16 noodles. The manicotti can be prepared through step 5, covered with a sheet of parchment paper, wrapped in aluminum foil, and refrigerated for up to 3 days or frozen for up to 1 month. (If frozen, thaw the manicotti in the refrigerator for 1 to 2 days.) To bake, remove the parchment, replace the aluminum foil, and increase baking time to 1 to 1 1/4 hours.

Tuesday, June 23, 2009

I LOVE Monday!

While most people, at least most working people and possibly school kids dread Monday's - I love them. Monday is the day I get to stay home with my little one. Monday is the one day of the week I can honestly say I look forward to and love. My Monday's are special and even sacred to me. It is a day where I get to wake up in the morning and cuddle on the couch with my little guy as we watch Elmo, Curious George and Sid the Science Kid in our pajamas. We cook together, we read together, we feed the ducks, play at the park, talk (Gabe and I have some awesome conversations), we listen to the radio while we eat lunch and sing and groove together, we sit outside on the porch and watch the birds, cars, trucks, kids and on Monday's the garbage truck (a fave for Gabe), we eat and take naps or Gabe eats and takes naps and I fold laundry and clean- either way Monday's are wonderful!

A couple of Monday's ago Gabe and I had a fun time doing some finger painting. He loves to finger paint and I love to see his excitement. I am so grateful that I have the opportunity to have Monday with my baby and I look forward in the future to a week full of Monday's. =)


Look Mum!

Tuesday, June 16, 2009

Chicken with Lemon and Rosemary

I found this recipe while searching online for a chicken drumstick recipe. It looked and sounded so delicious, that I knew I had to make it. This was SO good! I think it would have been a smidge better had I of used fresh rosemary as opposed to dry, but I didn't have any fresh rosemary on hand and I didn't want to make a trip to the store to pick up just one ingredient. Let’s face it any time you make a run to the store to get JUST ONE ingredient, you never leave with JUST ONE ingredient and before you know it $20.00 later...

Chicken with Lemon and Rosemary
http://oneperfectbite.blogspot.com/


Ingredients:
8 large chicken drumsticks
2 tablespoons butter
1 tablespoon olive oil
1 tablespoon chopped fresh garlic
Grated zest of 1 lemon
2 tablespoons chopped fresh rosemary (2 teaspoons dried may be substituted)
1 tablespoon all-purpose flour
1-1/2 cups low-sodium chicken broth
1 teaspoon Dijon mustard
Juice of 1 lemon

Directions:
1) Using a knife, make two diagonal cut in each chicken drumstick. Pat dry. Season legs with salt and pepper.

2) Place butter and oil in a large saute pan over medium heat. When hot add drumsticks and cook until all sides are brown. Add garlic, lemon zest and rosemary.

3) Combine flour, chicken broth, mustard and lemon juice in a small bowl. Whisk until smooth. Add to saute pan. Bring to a boil. Reduce heat and simmer, covered, until drumsticks are tender, about 25 minutes. Transfer drumsticks to a serving platter. Season sauce with salt and pepper to taste. Pour sauce over drumsticks. Yield: 4 servings

Monday, June 15, 2009

Fresh Strawberry Pie

Who doesn't love strawberries? I honestly believe that if you don't like strawberries that there may just be something wrong with you. You know, like you were dropped on your head as a child or something. =) I found this recipe for fresh strawberry pie on a new food blog I recently came across called http://castsugar.blogspot.com. It is awesome- check it out.

My husband was out of town a week or so ago on business for 4 days and when he came home I wanted to make a nice home cooked meal for him. This is what I served for dessert. This was actually my first attempt at making a strawberry pie. I had always wanted to make one and am not really sure why I waited so long, perhaps it is my fear of pies. I have mentioned in previous posts that pie dough is not usually my friend but thanks to America's Test Kitchen, I am one step closer to overcoming my fear of making pies. This pie was so delicious. I served it (of course) with some vanilla ice cream. It was the perfect compliment to our dinner and what made it even sweeter was enjoying it whilst cuddling on the couch with my handsome hubby.

Fresh Strawberry Pie

Adapted from Mr. Food
http://castsugar.blogspot.com


Ingredients:
1 (9-in.) deep-dish pie shell, baked and cooled (See recipe below)
1 1/2 c. granulated sugar
4 1/2 Tbsp. cornstarch
2 c. cold water
1 (3 oz.) pkg. strawberry gelatin
1 quart strawberries, washed, hulled, and sliced- I used a few more than this- I couldn't resist.

Combine sugar, cornstarch, and water in a medium saucepan. Stir and bring to a boil while stirring. Boil off until mixture is clear and thick. Add gelatin and stir to dissolve. Set aside to cool about 15-20 minutes.

After cooling for a bit, add sliced strawberries to gelatin mixture. Pour into pie shell and chill in refrigerator, at least 4 hours. Serve pie with whipped cream.

No-Fear Pie Crust
America's Test Kitchen
Makes one 9-inch Pie Shell

The pastry can be pressed into the pie plate and refrigerated for up to 2 days or double-wrapped in plastic and frozen for up to 1 month. Once baked and cooled, the shell can be wrapped tightly in plastic and stored at room temperature for up to 1 day.
1 1/4 cups all-purpose flour
2 tablespoons sugar
1/4 teaspoon table salt
8 tablespoons unsalted butter (1 stick), softened but still cool
2 ounces cream cheese, softened but still cool

1. Lightly coat 9-inch Pyrex pie plate with cooking spray. Whisk flour, sugar, and salt together in bowl.

2. With electric mixer at medium-high speed, beat butter and cream cheese in large bowl, stopping once or twice to scrape down beater and sides of bowl, until completely homogenous, about 2 minutes. Add flour mixture and combine on medium-low until mixture resembles coarse cornmeal, about 20 seconds. Scrape down sides of bowl. Increase mixer speed to medium-high and beat until dough begins to form large clumps, about 30 seconds. Reserve 3 tablespoons of dough. Turn remaining dough onto lightly floured surface, gather into ball, and flatten into 6-inch disk. Transfer disk to greased pie plate.

3. Press dough evenly over bottom of pie plate toward sides, using heel of your hand. Hold plate up to light to ensure that dough is evenly distributed (see photo 1 at left). With your fingertips, continue to work dough over bottom of plate and up sides until evenly distributed.

4. On floured surface, roll reserved dough into 12-inch rope. Divide into three pieces, roll each piece into 8-inch rope, and form fluted edge (photos 2 through 4). Wrap in plastic and refrigerate at least 1 hour.

5. Adjust oven rack to middle position and heat oven to 325 degrees. Lightly prick bottom of crust with fork. Bake until golden brown, 35 to 40 minutes. Cool on wire rack. (If large bubbles form, wait until crust is fully baked, then gently press on bubbles with kitchen towel. Bubbles will settle as crust cools.)

Sunday, June 14, 2009

My favorite pasta salad

When my husband and I adopted our son, my best friend Kami was kind enough to throw me a baby shower (at extremely short notice) at her home. That was the first time I had ever tasted this salad. It has been my go to pasta salad recipe ever since and I loved it so much I have never had a desire to try another pasta salad recipe. Not only is it delicious, but it is extremely easy and fast to throw together. The secret to this salad is the dressing. The dressing used is Bernstein's Restaurant Italian Dressing (see image below). I made a few modifications to this salad based on my personal tastes but you could add whatever it is you and your family enjoy.


Pasta Salad- The way we like it

1 pound of garden rotini pasta - cooked al dente and then cooled
1 ripe avacado chopped
1 cucumber chopped
1 cup of cooked and cooled white corn (could use yellow corn, we like white)
1/2 cup of pine nuts (I ommited these the last time I mad this as I had non
e)
Bernstein's Restaurant Italian Dressing- as much or as little as you like

Cook the pasta untill al dente, drain and set aside to cool. Cook corn (I just cook it in my microwave) and set aside to cool while you chop your fresh ingredients. Once the pasta and corn is cooled add all of your chopped/grated fresh ingredients. Add as much or as little dressing as you like. Finally sprinkle with pine nuts.

Some other possible salad toppings could include:

Olives
cherry tomatoes
grated carrot
grated or small blocks of your favorite cheese
mushrooms
chopped apples

Friday, June 12, 2009

Fun with the ducks

This past Friday, we braved the crazy stormy weather and took Gabe to feed the ducks. Gabe LOVES to feed the ducks! I mean what kid doesn't? He loves anything to do with animals so we can often be found either feeding the ducks, or visiting the horses and cows in Farmington. It is nice to have something he loves to do so much that is close to home and FREE! I think that taking him to see the animals as often as we do has also helped him with learning all the animals and their associated sounds. He can do almost any animal sound now and it is so cute to watch him do it. He can do lamb/sheep, goat, duck, frog, bird, cow, horse, elephant, dog, cat, bee, lion, tiger and I know I'm probably forgetting some.

For those who don't see our Gabe much here are some pics. Excuse the terrible ones of me. Brad was having lots of fun with our new camera!


He has quite the arm!


While we were feeding the ducks there was another little family feeding the ducks along side us. They had a little boy who was probably about 3 and his name was also Gabe which was fun. It isn't a overly common name we are finding. He and our Gabe made friends and when the other Gabe ran out of bread our Gabe was so cute and offered some of his. Funnily enough the kid put it straight into his mouth. Good thing it wasn't old bread that was stale or worse moldy!

Gabe just has the most awesome smile! It absolutely thrills me to see him get excited about things.

See the slope right in front of us? Yeah Gabe got a little too close a couple of times and freaked me out. Of course Brad just thought it was funny and laughed and kept on snapping away!

DUCKS!

I love this photo. He is growing up way too fast and before I know it, he won't want to hold my hand and walk beside me any more. Sniff sniff!

C'mon Mum- Lets run away from Daddy!

My angel!

Feeding the ducks was officially over when Gabe decided it was time to sit on the dirty sand and dig in it with his hands. EEEEKKKK!!!

Nats EASY any meat marinade

I have ALWAYS loved any kind of marinated meat. Grilled or Barbequed meat just tastes better when it is marinated - I think. I came up with the recipe for this marinade while I was a teenager living at home and my family always loved it. It tastes great on both chicken and red meat and is so easy to put together. This past week we enjoyed a little BBQ at home and I used this marinade on some chicken tenders I had. They were delicious!

Nats any meat marinade


1 cup of tomato ketchup
2 tablespoons of soy sauce
2 tablespoons of Worcestershire sauce
splash of lemon juice
1 minced clove of garlic

Simply combine all of the ingredients in a bowl. Once combined, place over meat in a tupperware container and let marinate. Over night marinating is best, but as long as the meat has at least an hour to sit in the marinade, the flavors will have enough time to permeate the meat.

Enjoy!

Thursday, June 11, 2009

Strawberry and Cream Bars- Betty Crocker

With a name like this it is no wonder my attention was snagged. I can't even remember now why I was on Betty's website, all I know is that this is a fabulous recipe and one that I will make time and time again. I'm always on the look out for a delicious strawberry recipe. What is summer without some fabulous strawberry desserts?

That being said I have made this twice now and I found it took some finagling for me to get it just how I wanted it. It was delicious the first time around but I loved it even more once I made a couple of small modifications. I made this most recently for a family BBQ we had. Everyone really seemed to enjoy it.

Strawberry and Cream Bars- Betty Crocker
Strawberry and Cream Bars- Slightly modified


Ingredients:
1 pouch Betty Crocker® sugar cookie mix
1/2 c. butter, softened
1 egg
1 c. white vanilla baking chips (6 oz)
1 pkg. (8 oz) cream cheese, softened
4 c. sliced fresh strawberries
1/2 c. sugar
2 Tbsp. cornstarch
1/3 c. water
1 3 ounce box of strawberry gelatin

Heat oven to 350 F. Spray bottom only of a 13x9-inch pan with cooking spray. In large bowl, stir cookie mix, butter and egg until soft dough forms. Press evenly in bottom of pan. Bake 20 to 25 minutes or until light golden brown. Cool completely, about 30 minutes.

In small microwavable bowl, microwave baking chips uncovered on High 45 to 60 seconds or until chips are melted and can be stirred smooth. In medium bowl, beat cream cheese with electric mixer on medium speed until smooth. Stir in melted chips until blended. Spread mixture over crust. Refrigerate while making topping.

In small bowl, crush 1 cup of the strawberries. In 2-quart saucepan, mix sugar and cornstarch. Stir in crushed strawberries, 1/3 cup water and strawberry gelatin. Cook over medium heat, stirring constantly, until mixture boils and thickens. Cool 10 minutes. Gently stir in remaining 3 cups strawberries. Spoon topping over filling. Refrigerate 1 hour or until set; serve within 4 hours. Store covered in refrigerator. (see note below)

***NOTE***-
The key to having this desert be perfect is getting the base cooked just right. The first time I made this the base was perfect. Soft and slightly chewy. The second time I made this, I was in a hurry and I'm not sure if I slightly overcooked the base or if by throwing it in the freezer to firm up the cookie base got hard. Either way be sure not to overcook the base and I don't suggest cutting corners and putting this in the freezer to firm up. I also suggest letting this dessert come close to room temperature before serving it.

Tuesday, June 9, 2009

Cheddar Cheese Ball

Another cheese ball recipe. This is the very first one I ever made. Given that it was from America's Test Kitchen, it is no wonder it was so good. Once again oh so easy and delicious. You could make any additions such as bacon, fresh herbs etc to change this recipe up. I think the next time I make one of these I'll add some bacon to it. Yummmm!

Cheddar Cheese Ball
America's Test Kitchen

1 (8 ounce) packages cream cheese, softened
2 tablespoons of mayonnaise
1 tablespoon worchestire sauce
1 teaspoon minced garlic
2 cups of grated cheddar cheese

1.In a medium bowl, beat together the cream cheese, mayonnaise, worchestire sauce, and garlic until smooth. Once smooth, add cheddar cheese and continue to blend until all ingredients are well incorporated. Wrap the mixture in some clear plastic wrap and mold into a rough ball shape. Refrigerate 6 to 8 hours, or overnight. Once refrigerated, unwrap the ball and re-shape to make a neat ball. Roll the ball in sliced almonds.

Let the ball sit out for 15 minutes before serving so that it has enough time to soften a little.

Enjoy!

Monday, June 8, 2009

Strawberry cupcakes with Cream Cheese Frosting- YUMMO!

This is the recipe for the strawberry cupcakes with cream cheese frosting that I made for my friends baby shower. These were so delicious. I was worried that despite all of the fresh strawberries added to the batter that the strawberry flavor wouldn't come through. Though it was subtle, for me it was just the right amount and these were delicious! They were a definite crowd pleaser. I got the baby idea from Wilton's website. Aren't they cute!

Strawberry cupcakes with Cream Cheese Frosting

Adapted from Martha Stewart recipe
Ingredients:
1 1/3 c. whole fresh or frozen strawberries, thawed
1 sugar or honey
1 1/2 c. all-purpose flour, sifted
1 tsp. baking powder
1/4 tsp. coarse salt
1/4 c. whole milk, room temperature
1 tsp. pure vanilla extract
1/2 c. (1 stick) unsalted butter, room temperature
1 c.sugar
1 large egg, room temperature
2 large egg whites, room temperature

Preheat oven to 350 F. Line a 12-cup muffin tin with cupcake liners; set aside.
Place strawberries and honey or sugar in a small food processor; process until pureed. You should have about 2/3 cup of puree, add a few more strawberries if necessary or save any extra puree for frosting; set aside.
In a medium bowl, whisk together flour, baking powder, and salt; set aside. In a small bowl, mix together milk, vanilla, and strawberry puree; set aside.

In the bowl of an electric mixer fitted with the paddle attachment, cream butter on medium-high speed, until light and fluffy. Gradually add sugar and continue to beat until well combined and fluffy. Reduce the mixer speed to medium and slowly add egg and egg whites until just blended.

With the mixer on low, slowly add half the flour mixture; mix until just blended. Add the milk mixture; mix until just blended. Slowly add remaining flour mixture, scraping down sides of the bowl with a spatula, as necessary, until just blended.

Divide batter evenly among prepared muffin cups. Transfer muffin tin to oven and bake until tops are just dry to the touch, 22 to 25 minutes. Transfer muffin tin to a wire rack and let cupcakes cool completely in tin before icing.

Cream Cheese Frosting
(from Ina Garten)
Ingredients:
2 pkgs. (16 oz. total) cream cheese, at room temperature
2 1/2 sticks unsalted butter, at room temperature
2/3 lb. powdered sugar, sifted
1 tsp. vanilla

Combine cream cheese and butter thoroughly. Add sifted powdered sugar, and beat until combined. Beat in vanilla.

Saturday, June 6, 2009

Garlic Cheese Dip Ball

Let me just say right now that I will NEVER buy another dip ball from the store again! I made my first dip ball a few weeks ago when my sister in law Shanna was moving into her house for all the helpers to snack on. I was blown away by how fast and easy it was. It literally took me 10 minutes to throw this together and I was done. Minus the sliced almonds, I even had all the ingredients on hand at home - a HUGE plus! This is the second cheese ball recipe I tried. I'll pull the other one out of my cookbook and will post it soon. I made this one for the baby shower. Being a lover of ranch, cheese and garlic I knew I'd love this one. It did not disappoint me.

Garlic Cheese Dip Ball


2 (8 ounce) packages cream cheese, softened
1/2 cup butter melted
1 tablespoon prepared Dijon-style mustard
1 teaspoon minced garlic
1 (1 ounce) package ranch dressing mix

1.In a medium bowl, beat together the cream cheese, butter, Dijon-style mustard, garlic and ranch dressing mix. Wrap the mixture in some clear plastic wrap and mold into a rough ball shape. Refrigerate 6 to 8 hours, or overnight. Once refrigerated, unwrap the ball and re-shape to make a neat ball. Roll the ball in sliced almonds.

Let the ball sit out for 15 minutes before serving so that it has enough time to soften a little.

Enjoy!

Friday, June 5, 2009

Ranch Chicken Appetizers

This recipe is one I came up with after making the tomato-basil appetizers I posted for Memorial Day. I really think that using the Pillsbury biscuits in this manner makes the possibilities for this appetizer endless. Use your imagination. I think that BBQ chicken appetizers would be great too. Hmmmm the wheels are spinning! I'll say it again - these are so easy to make and are simply delicious! These will have your guests thinking you slaved in the kitchen for hours when in fact it was just minutes!

Ranch Chicken Appetizers
By Nat


INGREDIENTS
1 Rotisserie chicken cut into small pieces
1/4 cup or more or less of ranch dressing (suit your own tastes)
1/2 cup of grated mozzarella cheese
2 cans (7.5 oz) Pillsbury® Grand buttermilk biscuits
finely shredded Parmesan cheese for sprinkling on top of appetizer

DIRECTIONS
1. Heat oven to 375°F. Spray 20 mini muffin cups with cooking spray. In medium bowl, mix chopped chicken, ranch dressing and mozzarella cheese.
2. Separate dough into 10 biscuits. Separate each biscuit into 2 rounds. Slightly roll out each round to flatten a little. Press 1 round in bottom and up side of each mini muffin cup. Spoon about 2 teaspoons chicken filling into each cup; press in lightly. Sprinkle with Parmesan cheese.
3. Bake at 375 degrees for approximately 15 minutes or until golden brown on top. Serve warm.

Thursday, June 4, 2009

Spring Baby Shower

This past Saturday I threw a baby shower for my friend Ximen (pronounced Sha-men). She is due in just a couple of weeks to have her first baby. She is having a girl and is planning on naming her Hadley Mae. CUTE!

My husband and I (but mostly my husband) had been frantically working on finishing up some kitchen renovations and had hoped to get them all done in time for the shower. Unfortunately, due to work, school and our stint in the hospital etc we didn't quite get all that we had hoped done but it all worked out in the end. Those who attended had a lovely time chatting and snacking on delicious finger foods and Ximen was spoiled with some lovely gifts for her little one.

I plan to post pictures of our kitchen once it is all finished. It is looking so cute and my husband who is doing all the work has done an incredible job. I am so proud of him! Thank you honey - I LOVE LOVE LOVE my kitchen!

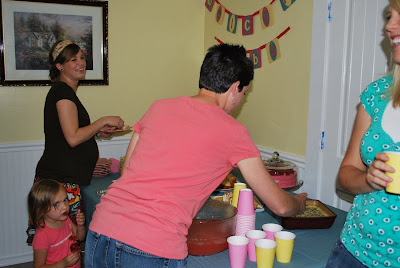
At the shower we had strawberry cupcakes with cream cheese frosting, strawberry skewers, I made two dip balls- one was a cheddar cheese dip ball and the other a garlic cheese dip ball, hot spinach and artichoke dip (thanks Holly), pikelets with homemade jam (Thanks Liz) and fresh whipped cream, a lemon cake with cream cheese frosting topped with fresh rasberries, a ranch chicken appetizer I came up with for the shower (recipe to follow tomorrow) and some homemade strawberry lemonade.

The soon to be mummy of Hadley Mae- Ximen


The food- I borrowed the cute plates and serving platters from a lady I work with. Thanks Kathi!


The cute cupcakes- I loved these and had a blast making them


Garlic cheese ball- This was so easy to make and was so delicious!

Cheddar cheese ball-

Strawberry skewers

Perfect lemon cake with cream cheese frosting- SO moist and delicious. My sister Shanna had fun coloring the frosting a girly shade of pink. I love it!


You can see how moist this is....I'm salivating

Ranch chicken appetizer

The strawberry lemonade- Thanks Mimi Sue- Notice the hearts! So CUTE!

The banner- I made this using my Cricut and I must say I was pretty proud of my non-creative self!

The party favors- I bought these cute little pink bottles online at http://www.orientaltrading.com. They were filled with various pink Jelly Belly jelly beans. I then made the label and added a tied pink bow. I was so pleased with these and thought they were adorable.

The guests
Kami and Ximen


Melissa in focus and Mimi Sue in the background

Ximen, little Lauren, Holly and Kami

Kami Melissa and Erin

Left to right- Tiffani, Sue, Amanda, Frances, Kelly,

Left to right- Amanda, Frances, Kelly, Erin, Ximen and Kristie